How to Create a Free Personal Website
So you’re thinking about creating a personal website?
So was I and I was putting it off for the longest time, because I didn’t want to deal with designing a whole site and then hosting it. I just wanted to put out some content. Then I came across Jekyll.
Using Jekyll allows me to:
- Not think about building or maintaining the website
- Not think about hosting
- Just create content
- Have a fast and SEO optimized website
What is Jekyll?
Jekyll is a static site generator (SSG), meaning it will take your content written in Markdown and transform it into a simple HTML based site ready to deploy. Yes, that means no HTML nor styling needs to be done! Yay!
I had used SSGs (like Gatsby) before, but I still had to think about hosting.
How to Host My Personal Website for Free
Github supports Jekyll and Github Pages is actually powered by Jekyll. And with Github Pages, you can host 1 site for free per Github user. It will hosted on <YOUR-GITHUB-USERNAME>.github.io, but you can ofcourse assign your own domain name to it too.
Another cool feature is that Github will give you a CI/CD pipeline out of the box and every change you push to main will be automatically deployed and updated on the live site!
Do I Need to Style My Website?
You can, but you don’t need to. Jekyll out of the box has some pretty vanilla-looking styling and for some that might be all they need.
If you need a bit more, you can choose from a myriad of themes available online. They will make your life extremely easy.
And if that’s not enough, you can always add you own CSS style sheets and even use Sass.
How to Create a Free Personal Website
For this site, I used the Chirpy theme. It gives me all the pages I need, search functionality, clean design and light/dark mode out of the box. We’ll do this tutorial with the Chirpy theme, so it might differ a little bit if you don’t use a theme, or use a different one. But overall it should be pretty similar.
Make sure you have the necessary dependencies installed.
If you don’t care about running it locally, you can skip this step.
You need to install Ruby and a few other dependencies, which you can check here.Create a Github repo for your personal website.
Go to the Chirpy starter and use it as a template to create a new repo. The repo name should be<YOUR-GITHUB-USERNAME>.github.io. So if your username isstevecronjobs, then the repo would bestevecronjobs.github.io.
You can opt to also create a fork, which is better for customizations, but harder to upgrade.Now that we have the repo, clone it locally and run
bundlein the root directory to fetch dependencies and build the site.To do any global configurations, edit the
_config.ymlfile. Most of the stuff is explained in the comments, so there is no point in going through them. But this is the place to set site titles, SEO descriptions, Google Analytics configurations, social and contact info etc.You’re ready to spin up the site locally. Run
bundle exec jekyll s --livereloadand navigate tohttp://localhost:4000to see it in action. This command also activates live reload, so any changes you make will be rendered immediately (except changes to_config.yml, then you need to restart the server).
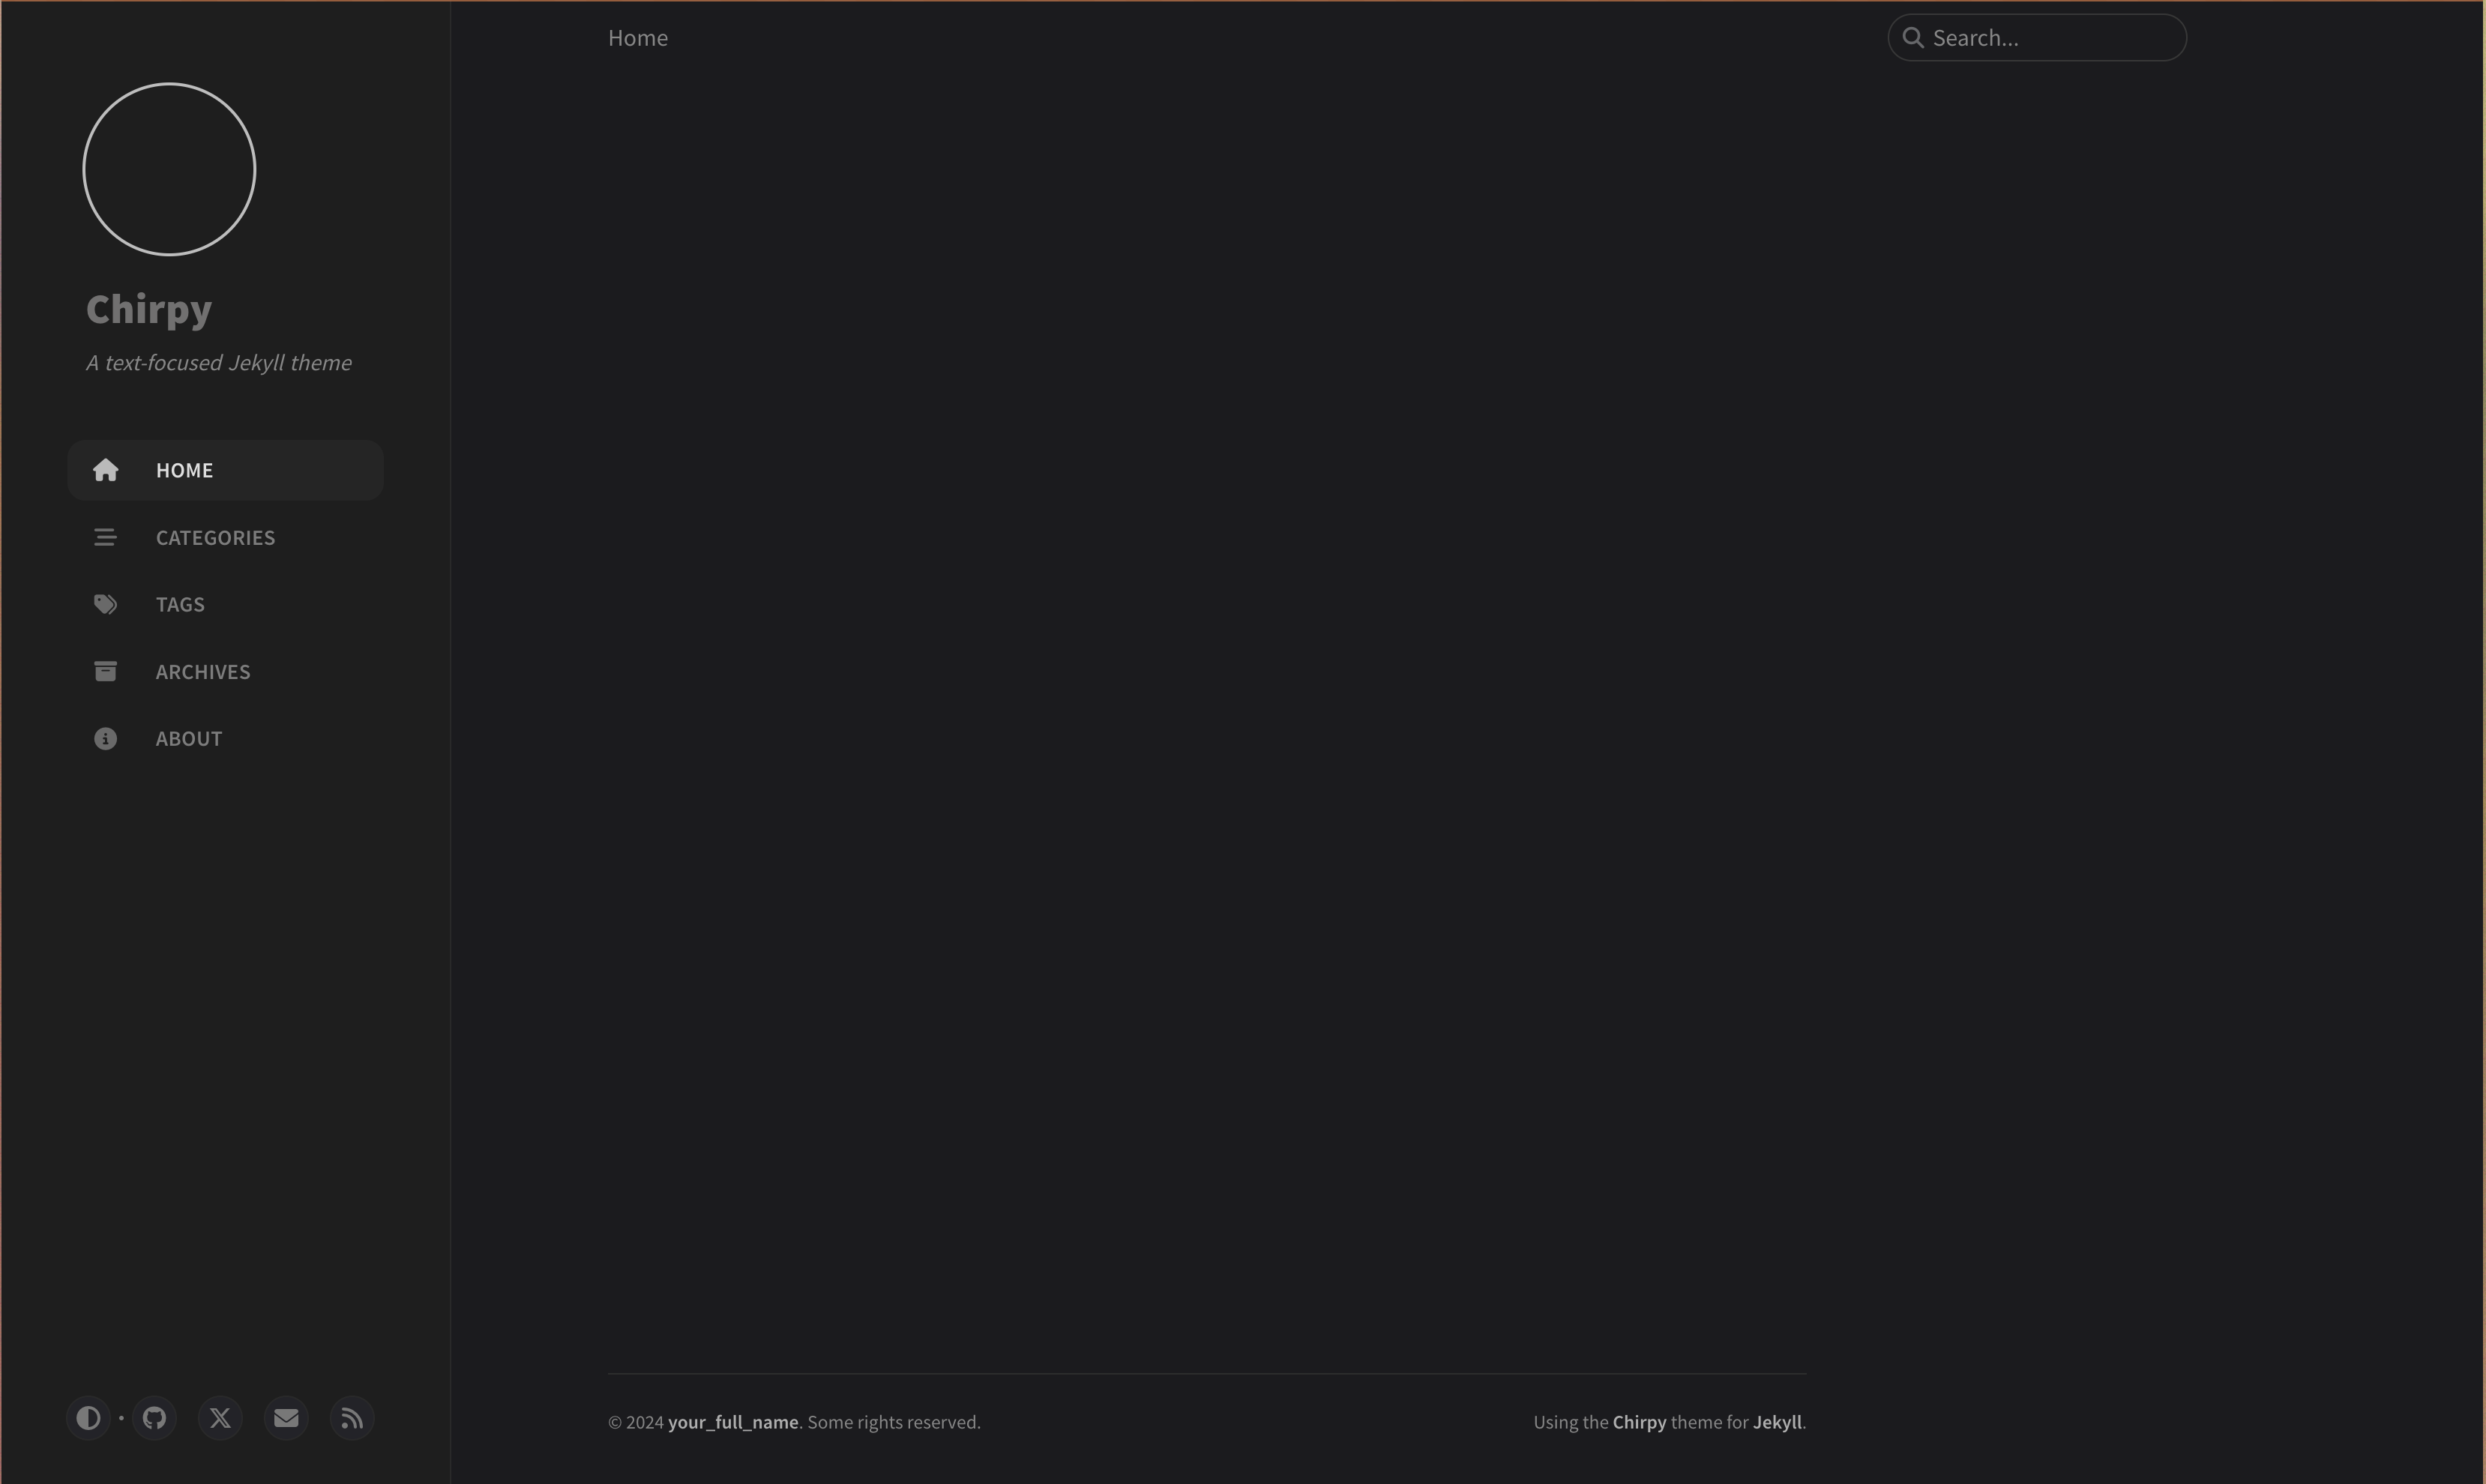 Empty website
- Currently the site looks very empty. Let’s see how to add some content.
You will be creating posts in Markdown. Here’s a cheat sheet if you need one.
To add a post, add a new file in the_postsfolder with the file name formatted like so:YYYY-MM-DD-title-in-kebab-case.md
1
2
3
4
5
6
7
8
9
---
title: Hello World!
date: 2024-05-01 16:00:00 +0200
categories: [Tech, Computers]
tags: [computers, cats, dogs]
---

## My first most awesomest post
Hello, **World**!
Between the dashes, we defined some metadata about the post.
title - title of the post
date - date of the post. Keep in mind that future dated posts will not be rendered.
categories - a maximum of 2 categories for this post
tags - unlimited number of lower-case tags
Then we also added a H2 and some text. If you check the site again, you should see it now has the first post and new categories and tags!
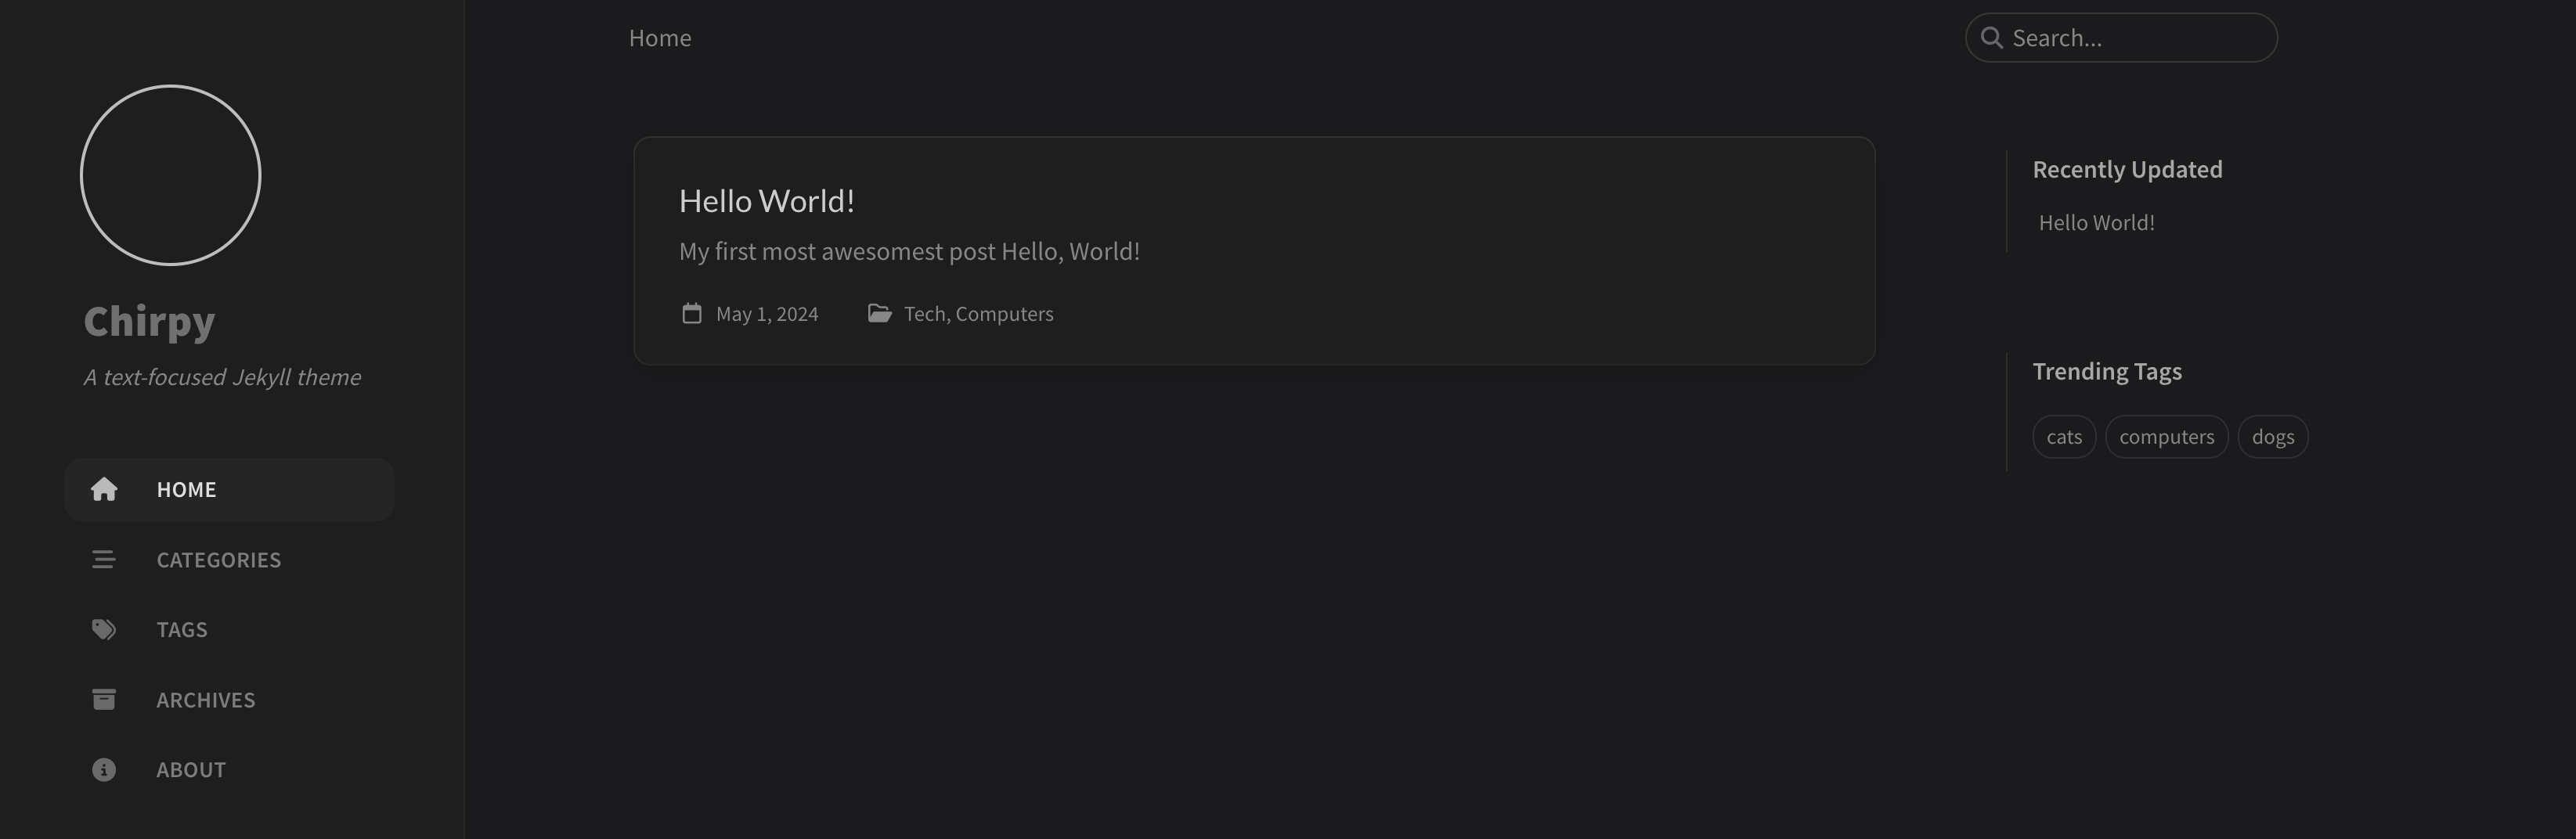 Website with first post
There is a bit more you can do with Chirpy than simple Markdow. Best place to learn would be to check out their wiki.
Now once you push your changes to the main branch, the CI/CD pipeline will be run and after a few minutes you can go to stevecronjobs.github.io and see your site live
Make Your Website Appear in Google Search Results
Now that you have some content on the site, it would be nice if it showed up in Google once someone searches for it. To achieve that, you need to let Google know to index your site.
- Log in to Google Search Console
- Verify that you are the owner of the site by writing your website URL in the URL prefix box and click “continue”
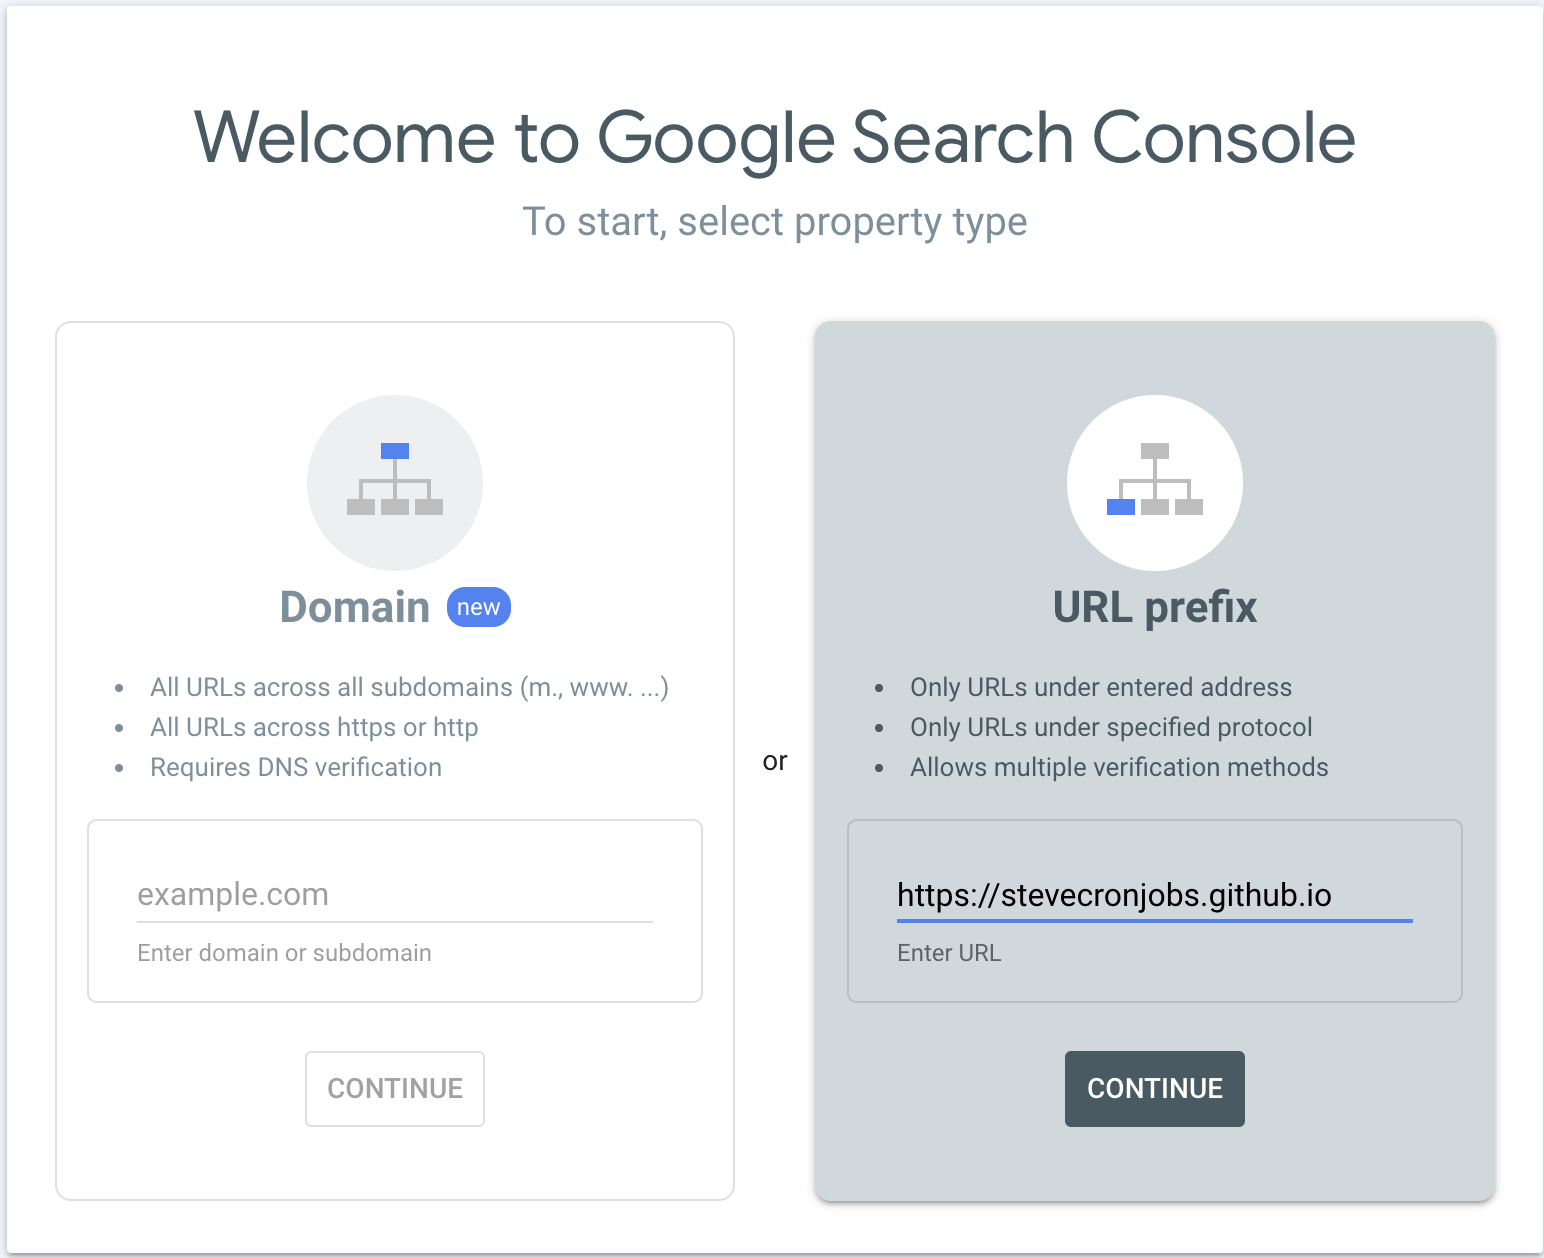 Choose verification by URL prefix
 Under “Other verification methods”, choose HTML tag and copy the string from the
contentproperty.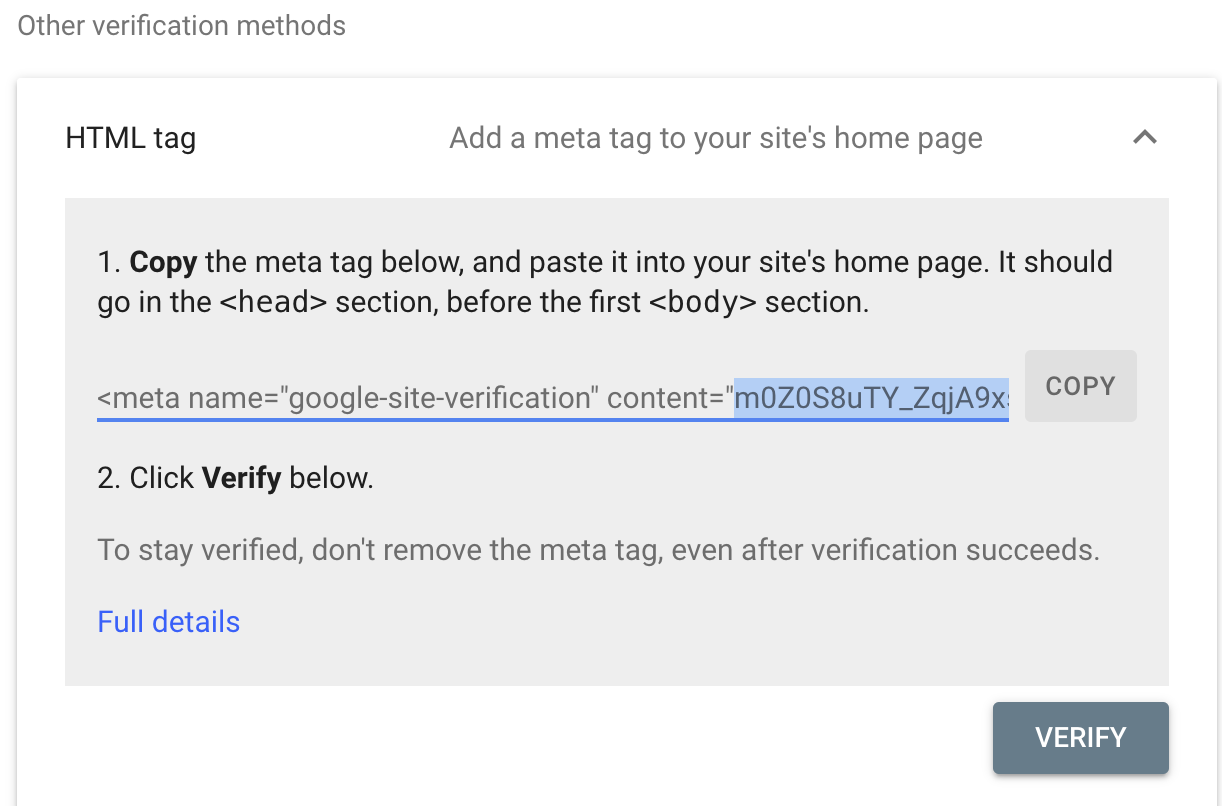 Copy the highlighted verification string
- Paste that string under
google_site_verificationin_config.yml1
google_site_verification: ...
- Once the site is deployed, click Verify in Google Search console
It will take a day or so for Google to gather data so be patient.
We would ideally also like to see user behaviour data and how many visitors we had. For that, we can easily set up Google Analytics.
- Log in to Google Analytics
Go through the account creation steps, if you haven’t before and create a website data stream.
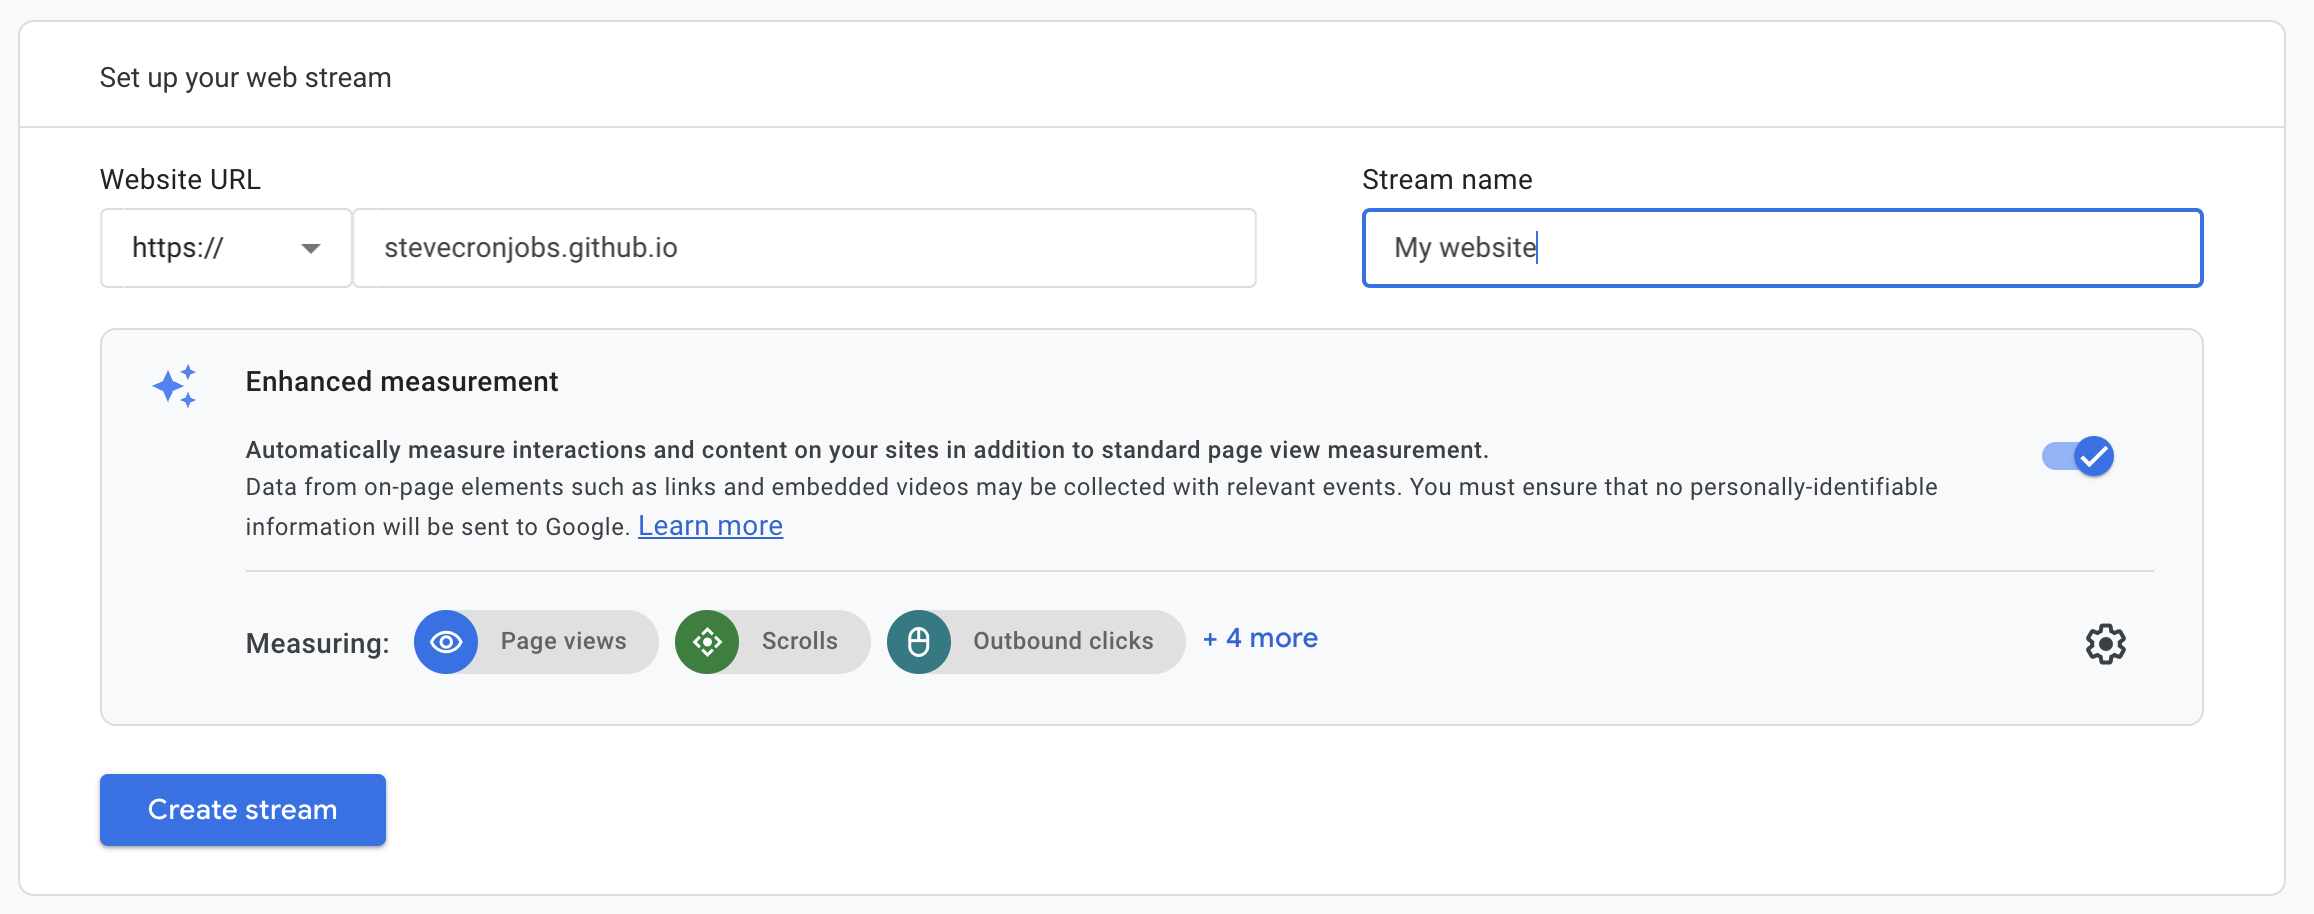 Create a Google Analytics stream
Once you’ve created it, you will see the Measurement ID, starting with
G- Google Analytics stream details
- Copy and paste it to
_config.yml1 2
google_analytics: id: G-...
- Once the site is deployed, you will start seeing analytics data about the visitors!
And that’s pretty much it! You can use it as your own blog, personal website or just as a backup for code snippets for example. Whatever your heart desires.